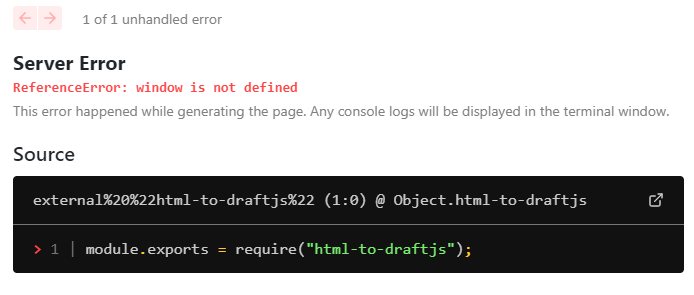
Fix for the issue window is not defined when using html-to-draftjs (npm link ) The version if the html-to-draftjs is 1.5.0 in nextjs version 10.0.5. Below is the error thrown when integrated htmlToDraft in page. This issue is fixed using below code at the top of the page just below imports Hope this helps, happy coding🍺🍺
-
-
Add component prop based on condition in ReactJS
In this article we will discuss how to add or pass a component prop based on a condition. Lets have a component named MyButtonComponent that takes a prop name Now I need to pass this prop based on a flag called hasName of type Boolean We can do this using the spread operator What are we doing? We are using spread operator to spread the object {name: “some text”} or an empty object {} based on the value of our flag hasName. To check the condition we are using ternary operator. So the component have name prop or no prop named name Hope it helps, happy coding… 🍺
-
Optional Chaining in ES7
What is optional chaining?Optional chaining allows you to access the value of a property in a nested object without the need to validate each object key/value in the chain. I will try to explain it with an example. I have an object, the value I have is deep inside a nested object. I want to check the value of dataExpiryDays and do something. We can do this like this Wait…. anyone using JavaScript might know the potential dangers of this approach. If any of the nested object is not available or null the above line of code will break. Example if the key edgeReels is not available, you will get…
-
ReactJS disable hook eslint warnings
Think twice when you are trying to disable the hook eslint warnings. This is was our prophet Dan Abramov say about it. Still if you want to remove the warning add the below like before the violating line // eslint-disable-next-line react-hooks/exhaustive-deps
-
Add Twitter timeline in ReactJS
Go to https://publish.twitter.com to get the embed code. Copy the embed code The embed code will look like this Goto index.html in your public folder in your ReactJS app. I assume you created the app via CRA Cut the script tag from the embed code inside your head tag in index.html Now we have only the first line that’s the anchor (“a”) tag. Added the anchor tag in you component wherever you need to show it. Now we need to load the twitter embed code. Do this to load twitter embed code For Class component For Functional component, use the useLayoutEffect hook Happy coding 🍺
-
Recharts show legend on top of chart
Use below to move Recharts legend to top of the graph. In fact you can position the legends any where (top, right, bottom , left, left top, left middle etc) you like. I have added few code samples for that corresponding images. Please go through it. I am using a Pie chart, so the above code will show legend on top of the chart and it looks like this. Lets try few other styles The overall code looks like this.
-
JavaScript – Find unique array
Here I will explain how to find an unique array from an array which has duplicates. There are different methods to find the unique elements in an array. Here lets use ES6 functions reduce and find. Checkout the working code sample below See the Pen Unique array using reduce and find by Kiran (@kiranvj) on CodePen. Happy coding…..
-
React Table 7.x – Hide Column Header Row
Scenario: I am using the new React Table 7x (the headless component). By default there will be a column header for the entire table columns. You can give empty string so that the Header will not be shown. By the problem is that row in html will be still rendered (see the below image). So I want to hide the entire row in html. I am using Material Table with react-table to render the table. Solution Add a custom key hideHeader: false, in the columns variable. In the Material table check for this key. This should remove the empty row from html output. Happy coding 🌟 🎄 🎅 🦌
-
File upload in Material UI
For basic file upload you can use the TextField component. The code will looks something like this. The important thing to note here is you need to set the type props to file How do you customize it? As the basic controls are not that fancy we may need to customize it. Since we are using Material UI its straight forward. Step 1 Create an html input with id and file properties. Use style='display:none' as we don’t want to show it. The code will look like this Step 2 : Customize it Create a label around the input which we created in step 1Add Material UI Button or Fab based…
-
Material UI switch with icons
Check the source at my github repo